The longer the computer is used, the larger the data cache. Also, the storage pressure on the notebook will increase daily, slowing the boot speed and making it difficult to open the installed software smoothly. In this post, I shall discuss 3 crucial SSD settings that users willing to upgrade their old computer’s HHD to SSD must apply if they want the desired speed and smoothness of the SSD.

Who Can Upgrade to a Solid-Stae Drive?

If you feel that the startup speed of the notebook is slow as a tortoise, the opening of the software is stuck and slow, and there is no idea of changing the computer for the time being, you can consider adding a solid-state drive to the computer.
Don’t miss:
How to choose a solid-state hard disk interface in one minute
Are mechanical hard drives going to be phased out? Seagate’s Q4 earnings plummet by nearly half
What Are The Benefits of Installing a Solid-State Drive?

- First off, installing a solid-state hard drive can improve the efficiency of daily use of the computer. The startup speed and software opening speed will be significantly improved.
- Especially for some old PCs, upgrading the SSD (doing a RAM upgrade simultaneously) is conducive to more powerful performance and a smoother experience.
How Does The Installation of solid-state drive Increase The Operating Speed?
Basically, The hard disk is used to store data. It takes time to read and store the data.
When we boot, the hard disk is reading; when we copy files, the hard disk is reading; we download things, and the hard disk is storing. Lastly, when we open the program, the hard disk is also reading/storing.

This process takes time, and the time consumed by solid-state drives (SSD) is often much shorter than that of mechanical hard drives (HDD). Therefore, after adding a solid-state drive to the computer, you will find that the boot becomes faster and the software opens faster!
3 crucial SSD Settings to Apply After Installing SSD to Your Old PC
It is expected that after installing SSD to your hitherto HDD PC, the changes in performance should be instant.
However, sometimes when a solid-state drive is installed, the boot is not fast, and the change in performance is insignificant. What is going on? Maybe you have forgotten these 3 crucial SSD settings?
1. The Operating system Should be installed on a solid-state drive and aligned with 4k
Once the system is installed on a solid-state drive, 4k alignment is required to truly take advantage of the upgrade.
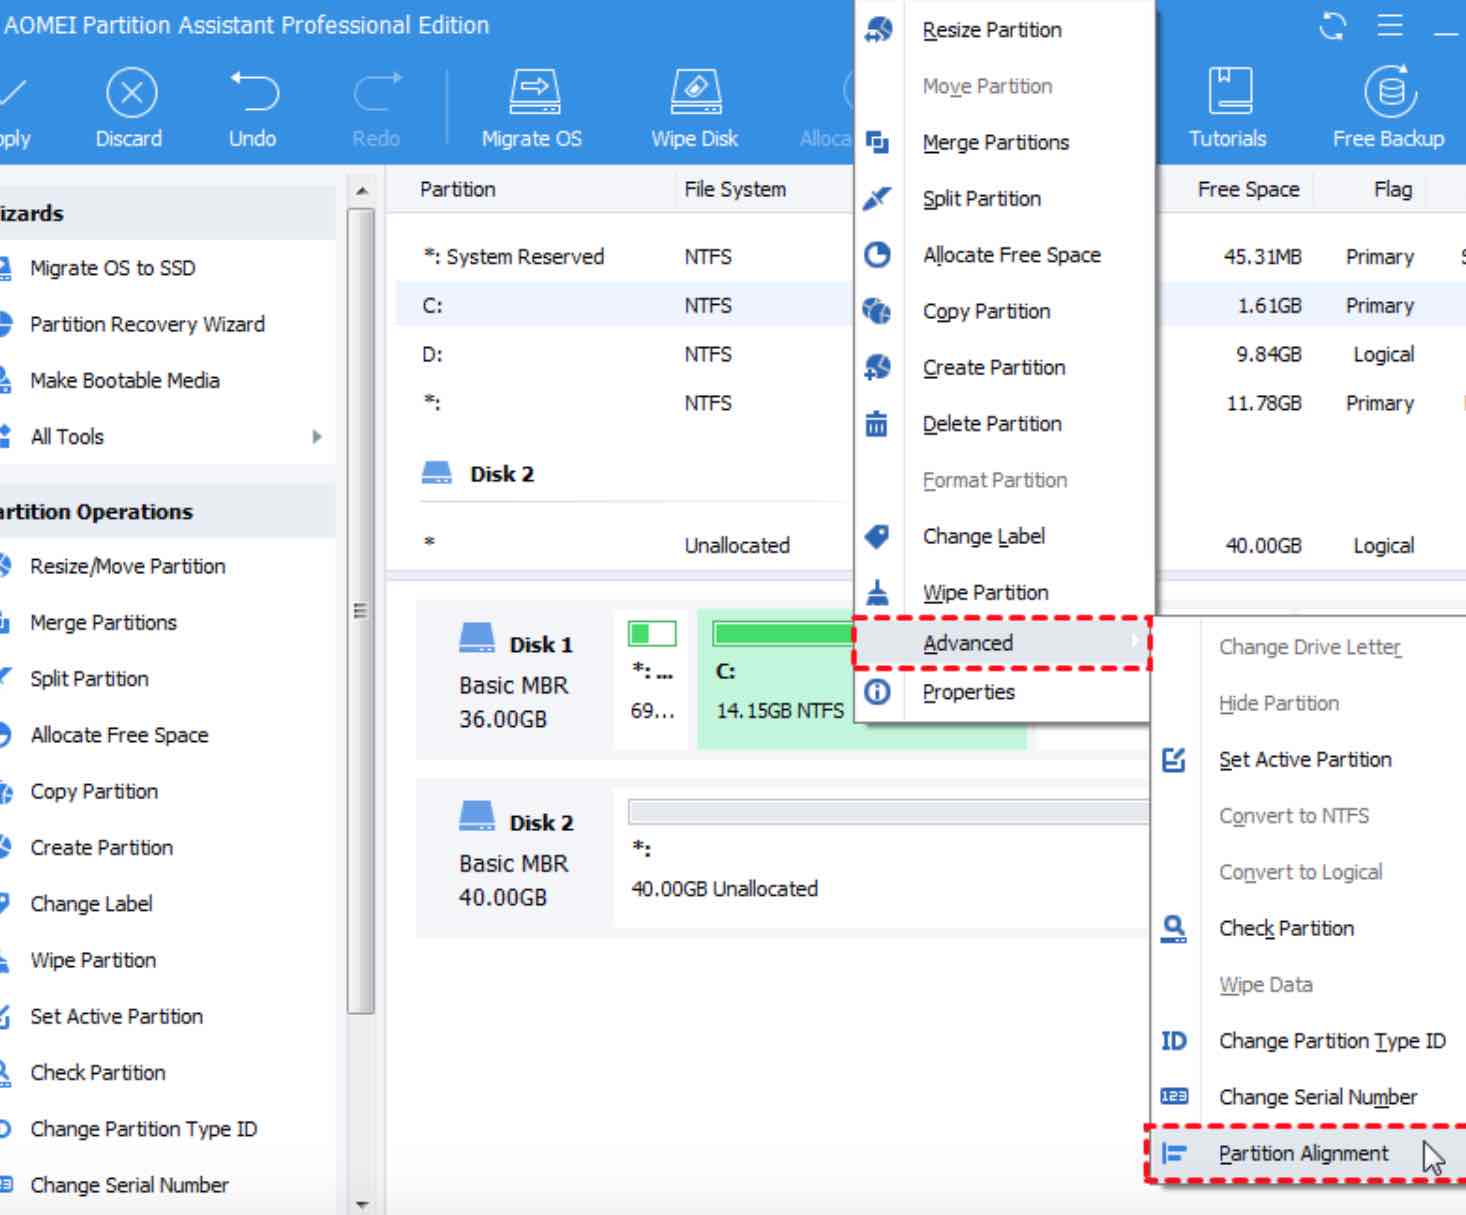
Generally, when the system is installed on the solid-state drive, it automatically performs 4K alignment.
However, If your hard drive is not 4K aligned, you can use the partition assistant to detect and perform the 4k alignment operation. An example of this can be found in the image above.
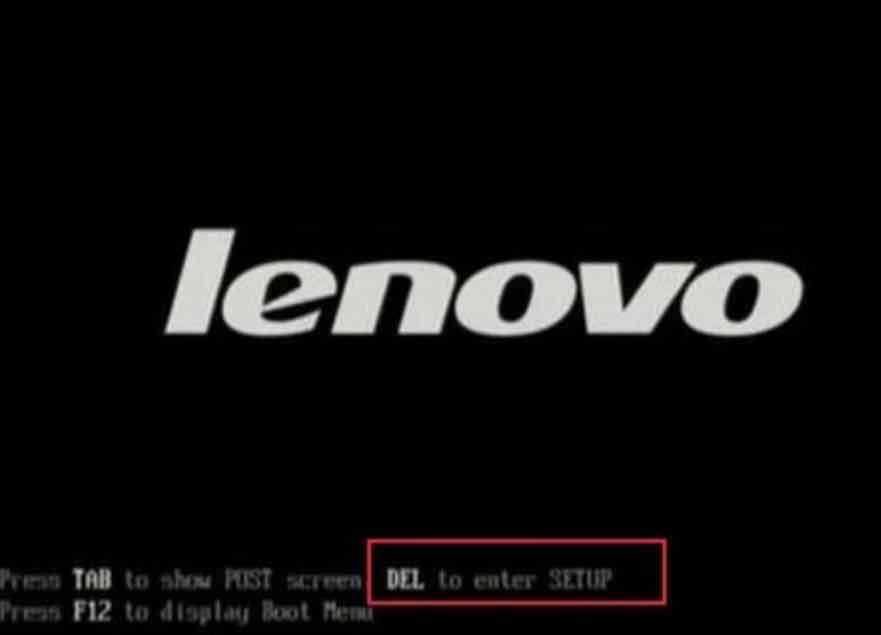
2. Set The AHCI Mode On Your BIOS
This is pretty easy. You need to modify the traditional hard disk “IDE” mode to “AHCI” mode to bring out the functions of the hard disk.
To do this, Restart the computer, and when you see the boot screen, quickly press the bios startup hotkey.
PS: The BIOS startup hotkey is usually displayed at the bottom of the boot logo interface. If you don’t know which key is the specific key, you can try to press del, ESC, f2, f9, f12.
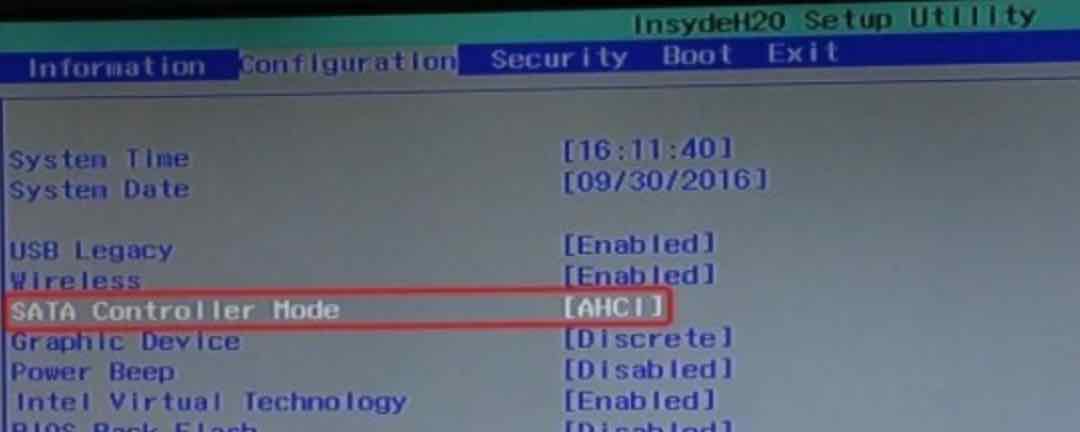
After entering the BIOS interface, check whether the working mode of operation of the hard disk is correct. To do this, find the “SATA mode” related option, set it to “AHCI” mode, and press F10 to save and exit. See the illustration below:
3. Disable Startup Items
In addition, we can further optimize the operating system, disable excessive boot add-ons, and reduce the burden of computer booting.
Right-click the “Start” menu and select “Task Manager” to open it. Then switch to the “Startup” option interface to disable unnecessary startup items.
Leave a Reply